Creating Patterns of drawing elements
With the command Array you can arrange drawing elements into a pattern.
Here's how to create a circular pattern:
- Click on Modify > Pattern
 on the Ribbon.
or
- Enter ARRAY in the command window.
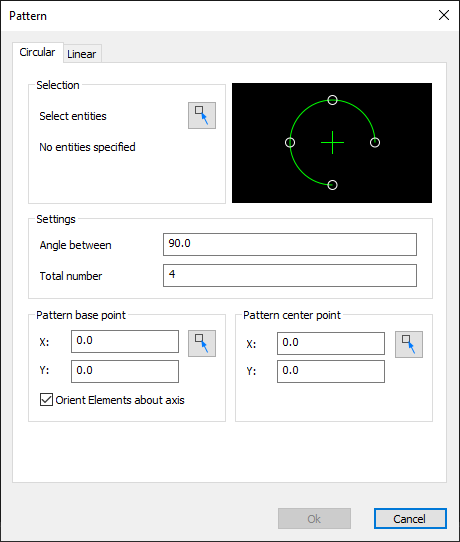
- In the dialog box, click the Circular tab.
- Click on the Button
 Select entities.
The dialog is hidden. - In the graphics area, select the drawing elements that are to form the pattern.
- Press Enter to complete your selection.
The dialog is displayed again. - Define the following properties in the Settings area:
Angle between the elements.
Total number of elements. - In the dialog window, specify the X; Y coordinates of the pattern base point
or
Click on the button to specify the pattern base point in the graphics area. - Activate the option Align elements around axis so that the drawing elements are rotated with the circular arrangement.
- Enter the coordinates X; Y of the pattern center in the dialog window.
or
Click on the button to specify the pattern center in the graphics area. - Click Ok to create the pattern.
How to create a linear pattern:
- Click on Modify > Muster on the Ribbon.
or
- Enter Pattern in the command window.
- In the dialog box, click the Linear tab.
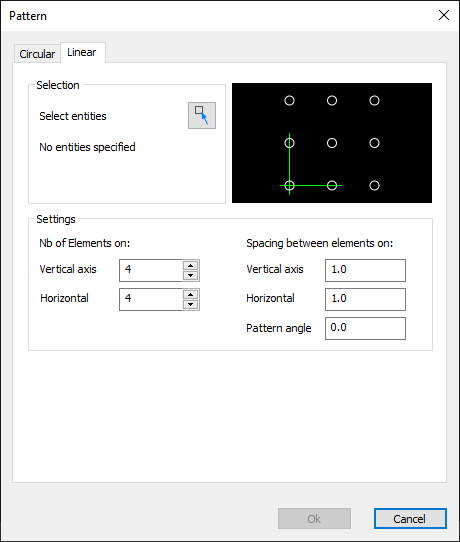
- Click on the Button Select entities.
The dialog is hidden. - In the graphics area, select the drawing elements that are to form the pattern.
- Press Enter to complete your selection.
The dialog is displayed again. - Define the following properties in the Settings area:
Vertical number: Number of elements in the vertical direction.
Horizontal number: Number of elements in the horizontal direction.
Vertical spacing: Distance between the elements in the vertical direction.
Horizontal spacing: Distance between the elements in the horizontal direction.
Pattern angle: Angle at which the pattern should be arranged. - Click Ok to create the pattern.